Sunday, July 31, 2011

On the Grow

I am doing the marker technique with Stampin' Up markers again to get shading, shadows, and depth.  I have discovered this process only works with small spaces but look at the results! I promise I know nothing about shading and making shadows. You can't tell me to pretend to shine a light from one direction and color darker in the places the light hits because I have no idea what that means. If I can do it YOU can do it. All you need are markers in the same color family that go from light to dark. The great thing about Stampin' Up markers is that you know they will match each other as well as our cardstock, ribbon, designer series paper, brads, buttons, the list goes on. The white gel pen is a must to add depth. A sahara sand marker gives shadow and even more depth.

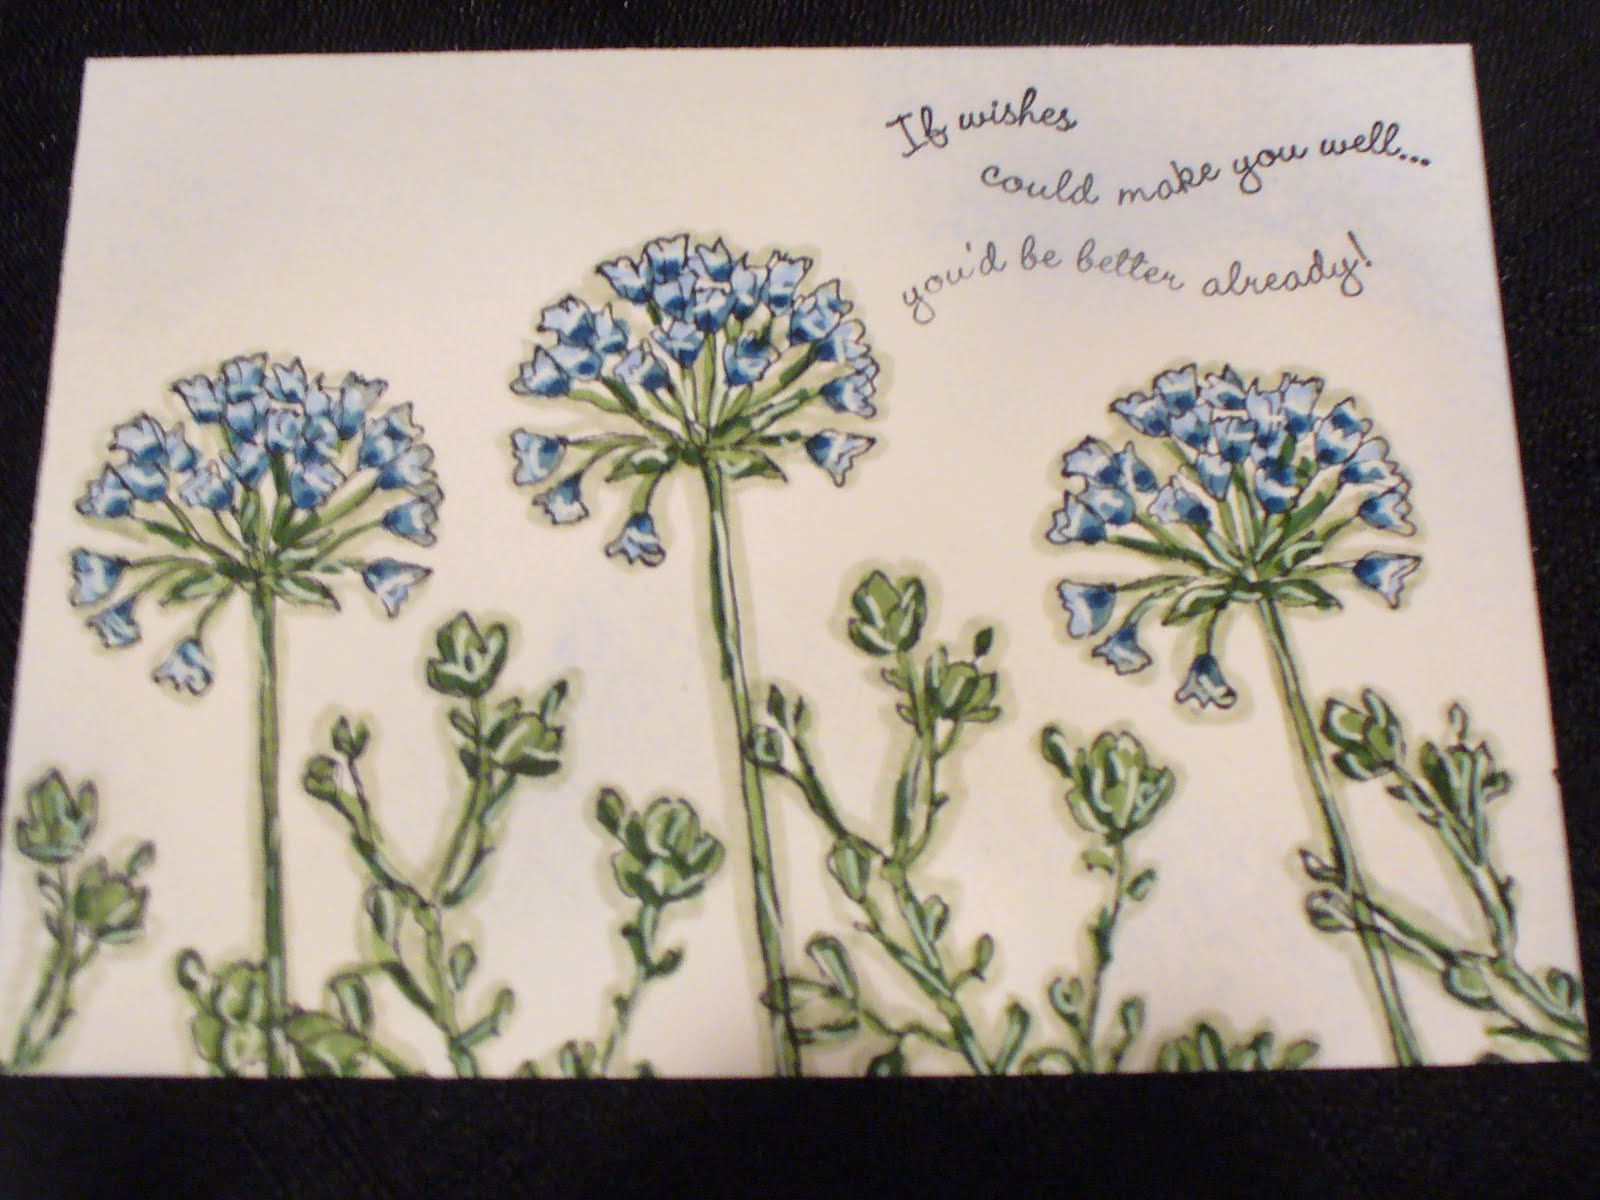
Remember to start with you lightest color, add the next color over that, then add a dot of the deepest color. For this card I found it easier to color the leaves first so I knew which ones they were. The ground is a bit of of celery and wasabi markers with sahara around it. For the water I used the white gel pen and scribbled back and forth over bashful blue where the water should be then I colored over the gel pen with bashful blue.

Sets: on the grow, sincere salutations
Cardstock: whisper white, marina mist
Ink: black stazon, marina mist
Accessories: big shot, lattice embossing folder, scallop square duo die, 21/2 circle punch, neutral brads, mat pack and poker, white ribbon, marina mist designer paper (subtles collection), sponge, dimensionals, white gel pen, markers in pink pirouette, pretty in pink, melon mambo, certainly celery, wild wasabi, bashful blue, marina mist, and saharah sand

This card is for SU Only Challenges. Come and play along!

Saturday, July 30, 2011

Raining Flowers

Here is another card of mine that was published in Stampin' Success magazine this month. I wanted to show that you really could do a simple card with this set. I used two strips of the red sticky tape to hold down the ribbon. If you take your bone folder and really push the ribbon into the tape it helps it not come off later. The double scallop edge is a really nice but quick accent. I added the stamped white cs, then the punched designer and punched whisper white. Then I put all of that through my Big Shot together using the tulip embossing folder lining it up with the white edge.

Sets: raining flowers, a word for you
Cardstock: melon mambo, whisper white
Ink: black stazon, melon mambo, pear pizzazz
Accessories: scallop edge punch, white brads, red sticky tape, big shot, tulip embossing folder, pear pizzazz dsp (designer series paper)

Raining Flowers

This is one of my cards that was published in the August Stampin'  Success magazine. Only Stampin' Up! demonstrators can see the magazine so I will post my projects here for everyone to see. I was sworn to secrecy until the magazine came out. It was a huge honor to be asked to create for the magazine. Of course when I got Raining Flowers in the mail my mind went blank. In the end I was very pleased with what I came up with. This card uses the stair step fold and lots of cutting out. I used the big shot to texture the background. Dimensionals hold are holding up the layers.

Sets: raining flowers, short and sweet
Cardstock: daffodil delight, whisper white, marina mist, melon mambo, pear pizzazz
Ink: melon mambo, marina mist, basic gray, daffodil delight
Accessories: big shot, dotted embossing folder, beautiful wings die, pearls, circle brads, little leaves die, dimensionals, scallop oval punch, medium oval punch

Friday, July 29, 2011

Suny Fun Pop Up Card


We made this pop up card at my workshop last weekend. It was really fun. The popsicle is made from the oval punch. The bite is from the scallop oval punch. The trick is to cut your cardstock thin enough to pull it through the punch so the tail hangs out and you only punch the top. Then you pull it out and cut the bottom off straight. I also sponged around everything which gives it dimension. I love the new striped embossing folder. What would I do without my Big Shot? To get this pop up tab I cut a one inch square out of the middle top (do not cut across the bottom- just the two sides). Push that tab in the opposite direction of the fold while closing the card. I cut another piece of cs to run through the big shot and so it would cover the hole left by the pop up tab. It is taped on over the base.

Sets: sunny fun, happiest birthday wishes
Ink: black stazon, tempting turquoise, pumpkin pie, daffodil delight
Cardstock: tempting turquoise, whisper white, melon mambo, daffodil delight, pumpkin pie
Accessories: bright brads, big shot, striped embossing folder, large scallop punch, large oval punch, scallop oval punch, circle from the big shot, markers in card colors plus pear pizazz (I think), dimensionals

Snowflake Pop Up Card


I have discovered the world of pop up cards. They are so fun to make! This one pops out on the right and left instead of just the middle. On the last picture you can see that I cut a scallop square (scallop square duo), folded it in half, then snipped it twice on an angle on the left of the center and again on the right of the center. You push the snips out in the opposite direction of the fold then tape this to the inside of the card. The angles let your pop ups stick out over the card edges when open but still fold to the center of the card for mailing. The swirls and snowflakes really come alive. I did all white on white for a challenge with the Late Night Stampers group. If you don't have a Big Shot yet this card will really push you to order one. You can have a class or a catalog party and earn one for half price. Let me know if you want more details on how to get your very own Big Shot. Christmas is coming!!

Sets: contempo christmas
Card Stock: whisper white
Ink: black craft
Accessories: black embossing powder, Big Shot, northern flurry embossing folder, rhinestones, white satin ribbon, scallop square duo die, dimensionals, swirls scribbles die, northern frost die

Wednesday, July 27, 2011

Love and Care


This is a hostess set in the summer mini called Love and Care. You can still earn it through August. It is a must have! I used pacific point and old olive cardstock. I found some retired pacific ribbon to add to second card. I do miss all of the old ribbon. I have a ton of it! Don't you love the new striped embossing folder? I never use buttons but this time I really love the look. I tied some linen thread around it hooking the striped ribbon before I tied it. Then I secured it all with a few glue dots. The words are a new set available in the new main catalog called Petite Pairs. It is great for small spaces, circles, and ovals.

Sets: Love and Care, Petite Pairs
Cardstock: whisper white, pacific point, old olive,m chocolate chip
Ink: black stazon, chocolate chip
Accessories: big shot, striped embossing folder, pacific point marker, old olive marker, retired ribbon, olive striped ribbon, brights button, linen thread, glue dots, sponge

Tuesday, July 26, 2011

Simply Soft /Marker Technique

Isn't this beautiful? I used Stampin' Up markers from light to dark to get this rich dimensional look. Our markers match our paper and ribbon so you know you are buying the right colors every time. I took pictures of each layer so you could see how it changes from marker to marker. The blue cardstock layers are pacific point and bashful blue. The flowers are on whisper white. I used white taffeta ribbon. The words are from curvy verses.
color everything in with bashful blue and wild wasabi markers
add marina mist marker on the bottom half of the flowers, add touches of garden green marker over the wasabi to highlight
 add a little dot with a pacific point marker at the very bottom of the flowers
 the white gel pen adds highlights on the flowers and the greenery
 sahara sand marker around everything adds shadow and depth


swirls with a sponge in bashful blue then sahara sand makes things pop even more

Thursday, July 14, 2011

Every Moment

Love, love, love this card!! These colors are gorgeous together. Crumb cake and pool party. Look around the image. Do you see the new embossing folder image? It is a WOW! I colored this with our watercolor paper with an aqua painter. The trick is to go around the entire image with sahara sand and an aqua painter before you add any color. It creates a slight shadow and helps the colors pop out. If you do it after you add the colors they bleed. Stamp, color, emboss. Sponge all the edges with crumb cake, too. Our new lace punch is a wonderful addition to our punch family.

Sets: every moment, curly cute
Cardstock: crumb cake, pool party, watercolor paper (31/2x21/2)
Ink: crumb cake. pool party, old olive, chocolate chip, black stazon
Accessories: big shot, designer frames embossing folder, dotted embossing folder, vanilla taffeta ribbon, crumb cake marker, sponge, aqua painter

Pennant Parade Christmas

Merry Christmas! Just kidding, but it is time to start thinking about your Christmas cards. This one takes some time but it really is a great card. I tried stamping the tree bottoms on the circle but in the end it was easier to cut them out so I could place them exactly where I wanted them. If you want to do multiples of this card I would use the jig. Do you see the new lace punch? I cut the circles out and mounted them around the white circle just to be different. The white circle is a 3 inch circle. I used the new striped embossing folder on the bottom of the card (just taped it right over the dotted part). The trees are all on with dimensionals, so is the entire big circle area. You need to stamp Merry Christmas before you run the paper through your Big Shot. I colored the triangles with a versamark pen then embossed them with iridescent ice before I cut them out. They really sparkle. I got to use the new ruffled ribbon. Love it!!

Sets: pennant parade, christmas greetings
Cardstock: lucky limeade, melon mambo, whisper white
Ink: melon mambo, chocolate chip, black stazon
Accessories: tag punch, pennant punch, dimensionals, iridescent ice, white bakers twine, ruffled lucky limeade ribbon, big shot, 3 inch circle die, dotted embossing folder, striped embossing folder, versamark pen, lace ribbon border punch

Pennant Parade

I am finally using the new pennant punch. I love how it makes the scallop edges. I wonder how long it will be before someone comes up with a unique way to use it. Who looked at the ornament punch and saw a polar bear head???? Who ever thought of putting reinkers in shaving cream to make a background? People who think out of the box amaze me. This card was pretty straight forward. I punched the red pennants then the stamped red triangles. The triangles are mounted with dimensionals. I love the red striped bakers twine. It just adds more dimension to the card. Happy birthday is embossed with white craft ink and white embossing powder.

Sets: pennant parade, happiest birthday wishes
Cardstock: daffodil delight, real red, tempting turquoise, whisper white
Ink: white craft, real read, tempting turquoise
Accessories: bakers twine (red striped), dimensionals, white embossing powder, 1/4 and 1/2 circle punches, pennant punch, scallop edge punch, big shot, lattice embossing folder, glue dots

Wednesday, July 13, 2011

Fabulous Florets


I think this is my favorite set ever. I am so glad it is in the new catalog! This time I cut the paper at 61/2x9. I scored it at 3 and 6. To get the diagonal line I put the top right corner on the cutting line of my fiscars cutter. I put the opposite corner pointing at 41/4 then made the diagonal cut. I stamped the flower heads then the stems. Some stems are stamped off. I also stamped on the back because you can see the back when the card is folded. I colored the flowers with a dauber and real red ink. Then I used a dauber and calypso coral ink over the red. It gave it a really neat effect. I put crystal effects over the centers. The front could use a butterfly but after the butterfly class I am a little tired of cutting them. Maybe later, lol!


Sets: fabulous florets, on your birthday
Cardstock: confetti white, lucky limeade
Ink: black stazon, real red, calypso coral, lucky limeade
Accessories: dotted scallop ribbon border punch, scallop trim border punch, long open ended envelope

Tuesday, July 12, 2011

Elements of Style Vintage

I tried my hand at vintage. It was a challenge but I really do like the end results.  I used very vanilla which I rarely do. I crumpled the flowers and sponged around the edges of everything in soft suede. I even sponged the ribbon to make it looked aged. The flowers, bird, and tag are on dimensionals. I punched the Thanks again and mounted it over the original stamped Thanks also with a dimensional.

Sets: Elements of Style, Perfect Punches
Cardstock: very vanilla, blushing bride, old olive, crumb cake
Ink: crumb cake, soft suede
Accessories: scallop edge punch, scallop oval punch, big shot, little leaves die, 5 petal punch, boho blossoms punch, sponge, dimensionals, metallic brads, vanilla ribbon

Monday, July 11, 2011

Touch of Kindness

I played with the last of the new colors. This blue is called Island Indigo. It is very pretty. I am also playing with the new flower punch for the first time. I was afraid of it, lol. Turns out it is very simple to use and pretty easy to press. You do need to stand up and push down evenly. This card seemed to lack something until I put Crystal Effects on the birds and the birdbath. That was exactly what it needed. I used a blender pen and the ink pad to color the birds. I didn't want them to get to dark. I was also able to put the birds and the saying on one block and stamp it all at once. I love it when I can do that. If you don't have the scallop square duo for your Big Shot, what are you waiting for?

Sets: touch of kindness
Cardstock: indigo island, whisper white, certainly celery, daffodil delight
Ink: black stazon, indigo island
Accessories: blender pen, triple layer flower punch, dimensionals, big shot, dotted embossing folder, little leaves die, markers in sahara sand, bashful blue, daffodil delight, certainly celery, crystal effects. circle ice brad, poker, scallop square duo

Strength and Hope

Loving those new in colors! This time I used three out of the five. If you buy this set Stampin' Up! will donated $2 to The Breast Cancer Research Foundation. This card goes with our long envelopes. You need to cut your cardstock at 61/2x61/2 and score it at 31/4. I used two layers of white. The butterfly layer is up on dimensionals. Easy!!

Sets: strength and hope. teeny tiny wishes
Cardstock: pool party, whisper white
Ink: pool party, calypso coral, wisteria wonder
Accessories: white ribbon, rhinestones, scallop oval punch, medium oval punch, dimensionals


Scallop Circle Snowman

I made this the same way the previous scallop circle was made (melon mambo, flower fest). I did have to dig up some old ribbon. I needed it to match his earmuffs. I used the paper crimper on a thin piece of black cardstock so I could scrunch and mold it around the top of his head to connect the muffs. The carrot was hand cut. I sponged around everything that isn't black. I added highlights with a white gel pen. I am just trying to beat the Memphis heat. I don't think it has ever been this bad. 109 heat index. I'm melting!!!!

Sets: none
Cardstock: whisper white, basic black, tangerine tango, bashful blue
Ink: pretty in pink, bashful blue, tangerine tango
Accessories: big shot, scallop circle, scallop oval punch, paper crimper, 1/2 and 3/4 circle punches, sponge, dauber (cheeks)blue ribbon, circle ice brad


Scallop Square Card

I have finally started using the new in colors. This one is wisteria wonder. It is a very soft purple. I used the scallop square duo die for the outside square. It is a perfect size for the fronts of cards. To get the flowers to puff out put them in the palm of your hand on push the centers with an eraser end of a pencil. This will really add great dimension to your cards. Sponging the edges is a must, too. Even the flowers have been sponged. Don't you just love Stampin' Up! rhinestones? They sparkle so much better than any other ones on the market. Our pearls have a much richer color, too.

Sets: bring on the cake
Cardstock: whisper white, wisteria wonder, certainly celery
Ink: wisteria wonder, black stazon
Accessories: rhinestones, big shot, dotted embossing folder, beautiful wings die, little leaves die, simple flower die, scallop square duo die, sponge

Scallop Circle Snowman


I am sure that by now you have seen a version of the cute guy. You need to make one. It is really fun. Each one has its own personality. Join a 13/4 circle and a 21/2 circle with a white brad (chin area). The join the 21/2 circle and a 37/8 circle with another brad (on mine it is between the 2nd and 3rd buttons). You are only joining two cirlces each time so he telescopes out. I did sponge the edges of all circles with blue first. I used a white gel pen to add dimension and snow. The snow on the hat is a little tiny piece of the cupcake from the cupcake punch. It just didn't look right with the gel pen. He is adorable!

Sets: contempo christmas
Ink: bashful blue, black stazon
Cardstock: whisper white, basic black, garden green, tangerine tango, chocolate chip, real red
Accessories: 13/4 circle punch, 21/2 circle punch, 37/8 circle scissors plus circle, snowflake punch (arms and leaves) cupcake punch (mouth, berries, snow on hat), 1/4 circle punch (eyes), owl punch (buttons), tangerine marker (carrot which was hand cut), white gel pen, sponge, mat pack and poker, white brads, small square punch, word window punch

Monday, July 4, 2011

Pretty Butterflies

Yet another butterfly card. Now I have to decide which 6 we are going to make for the Beautiful Butterflies class tomorrow. I love this one, too! Since it is a 61/2x31/4 card (which fits in our opened ended envelopes) I used a texturz plate to get the swirly background. It was perfect because the light impression doesn't take away from the card.

Sets: heard from the heart
Cardstock: whisper white, melon mambo
Ink: black stazon
Accessories: big shot texturz plate- swirls, rhinestones, beautiful wings die

Beautiful Butterflies Die

Look what I found to make my butterfly antenna. It is an old heart shaped paper clip! I cut it in half, flipped the pieces around and voila! Look closely above the card and you will see one uncut. I bet you have these in with your supplies someplace!! The rest of the card was a snap to put together. I stamped the flower stamp in pear pizzazz then colored over the flowers with a marina mist marker. I did this twice on the butterfly.

Sets: word play, charming
Cardstock: whisper white, marina mist
Ink: marina mist, pear pizzazz
Accessories: big shot, beautiful butterflies die, elegant bouquet embossing folder, marina mist ribbon, marina mist marker, heart shaped paper clip, rhinestones, mono glue

My new kitty, Frodo


This little guy wandered into my daughter's friend's house. They couldn't keep him so she brought him over here knowing her dad is allergic to cats. Two weeks later the dad and the cat are still here.  Isn't he adorable? Who could. have abandoned something so cute and lovable?

Sunday, July 3, 2011

Scallop Circle Card


I cannot take credit for this beautiful card. Dawn Olchefske at Do Stamping With Dawn created it. She even has a great video on how to cut the circle scallops. I added the butterfly so we could make it in the Beautiful Butterflies class coming up July 5th (see my calendar of events above for details). You need to use your big shot and the circle scallop die. I included a picture to help you see what to do. The first scallop is a single, the second one is a double. When I cut it I put the fold under four scallops. The score line is on the sixth scallop from the fold. The single then attaches to the folded up piece. I used the Circle Scissors Plus to make the 3 and 31/2 circles. We sell a big shot die that makes these, too. You will be surprised at how easy this card is to make. I want to play with the scallop square now. Stay tuned!

Sets: fabulous florets, sincere salutations
Cardstock: melon mambo, basic black, whisper white
Ink: black stazon, versamark, melon mambo, tangerine tango, wild wasabi
Accessories: new colored embossing powder in wild wasabi, tangerine tang, and melon mambo, daubers, stripe black ribbon, clear brad, glue dots, butterfly punch, 5 petal punch, 11/4 circle punch

The flowers are cut with the circle punch then trimmed the rest of the way. The leaves are cut from the five star flower with the punch then cut apart. The butterfly body is hand cut, but his wings are punched out. To add color over the embossed areas simply use your dauber and swirl the color on. Color out of the lines so when you punch you don't get stark white edges.

Saturday, July 2, 2011

Fabulous Florets

Very simple! I used the leaves from fabulous florets then added some butterflies sponged in red. I used a maker to add the antenna and bodies. We will be making this one in the Beautiful Butterflies class on Tuesday, July 5th. There are still spots available if you would like to come. See my calendar above for details.

Sets: fabulous florets, curly cute
Cardstock: whisper white, real red
Ink: pear pizzazz
Accessories: beautiful wings die, big shot, soft suede marker, red narrow grosgrain, mono glue.

Lattice Cross Sympathy Card


These started out as one card. I was trying to put the lattice cross over the swirls. It was way to overpowering. So, I had to start over but I didn't want to throw out the pieces. I really like both cards. The swirls cards was super simple. I just stamped with baroque motifs, added the boho flowers, layered butterflies, pearls, sponged around the edges, and added the words. The lattice cross is made from the lattice die. I just cut out the middle that forms a cross. This takes a bit of time because you have to cut carefully. I sponged around the edges then used a sponge to paint on frost white shimmer paint. I layered the top note on the razzleberry then ran both pieces through the big shot together. The cross is taped on the circle then that is mounted on the white with dimensionsals. The saying is also mounted on with dimensionals.

Sets: baroque motifs, retired sympathy words
Cardstock: whisper white, rich razzleberry, old olive
Ink: rich razzleberry
Accessories: sponge, pearls, dimensionals, boho blossom punch, beautiful wings die, big shot, scallop oval punch, medium oval punch, silver cord, vintage wallpaper embossing folder, top note die, little leaves die, 13/8 circle punch

Shimmering Wedding Cards


The shimmer on these cards really makes them wonderful. I used a sponge and painted Stampin' Up! frost white shimmer paint over the large flowers. I also did it on the butterfly on the top card. I can't believe I never use that paint. I will now! It dried it a  flash with the heat gun. The little flowers have blushing bride centers. I used a pencil (eraser end) and pressed the punched flowers into the palm of my hand to get them to bend out. The butterflies are sponged around the edges in blushing bride. The saying is from a retired set, but I don't know which one. It is on a white base but their is a second layer of embossed white held on with dimensionals. Every little thing you do like this just makes your cards more spectacular.

Sets: retired word set
Cardstock: whisper white, blushing bride
Ink: blushing bride, silver craft
Accessories: big shot, beautiful wings, sponge, pearls or rhinestones, boho blossom punch, 1/4 circle punch, silver embossing power, silver cord, frost white shimmer paint, simple flower die, framed tulips embossing folder, mono glue, dimensionals
Related Posts Plugin for WordPress, Blogger...